
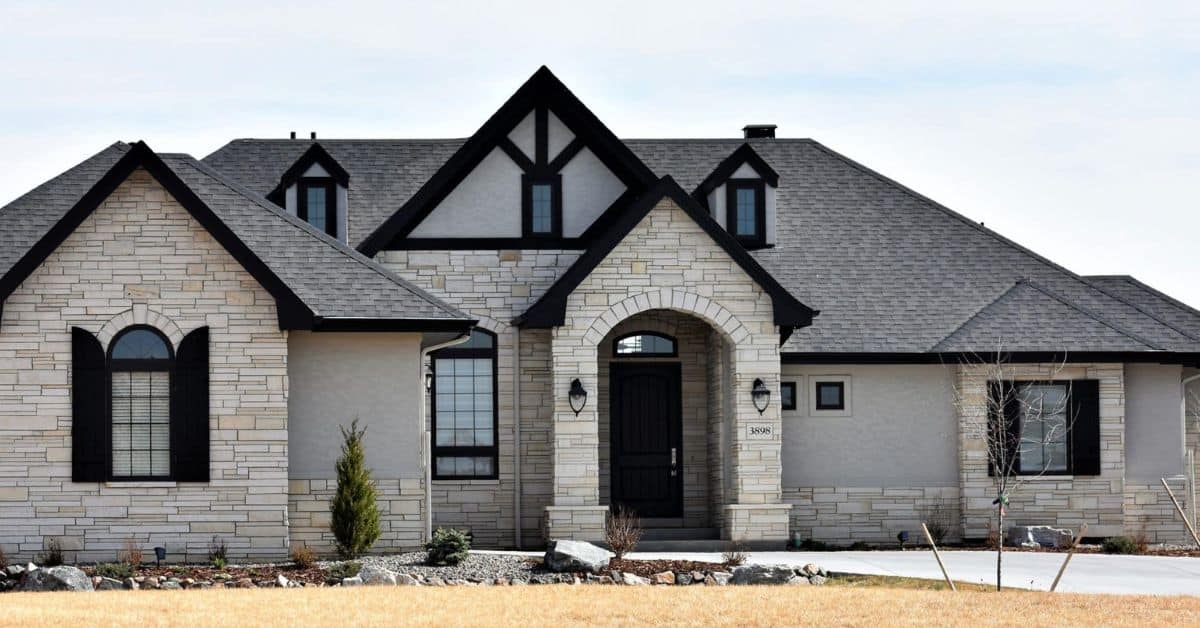
Stone veneer has been a popular design choice dating back thousands of years to the Roman period, and today it remains among the best options to enhance your home with a timeless aesthetic. Also known as stone cladding, this architectural design can be used in a variety of places throughout your home, giving any wall of any material the appearance of having been built entirely of stone.
The first step is to source the stone of your choice, but the real challenge begins when it’s time to install. If you or someone you know is eager to begin their stone veneer installation, here are some expert tips from the The Rock Garden - the best choice for natural stone veneer products in Fort Collins.
Stone veneer can be installed on any load-bearing wall made of just about any material. Traditionally it has been used to enhance the exterior of homes and commercial buildings, but but it can also be deployed to enhance structural elements like pillars, archways, and beams.
Stone veneer is commonly installed in places where you want to elevate the aesthetic appeal. Exterior applications include residential home facades, outdoor kitchens, retaining walls, pool sides, and garden walls, creating a rustic yet elegant look. Interior spaces that can greatly benefit from stone veneer installation are living room accent walls, kitchen backsplashes, fireplace surrounds, wine cellars, and bathroom walls. Additionally, commercial buildings, such as restaurants, offices, retail stores, and spas can also incorporate stone veneer into their design for a sophisticated and inviting ambiance.
Before diving into our tips for installing stone veneer, let’s take a quick look at the different considerations you’ll need to make in choosing the right type of stone for your project. It’s always easier to shop for stone veneer in person so you can see your different options and get a better understanding of how the stone looks rather than trusting a picture alone. You can also get a sample to see how the stone will look at your home in natural, outdoor lighting.
Stone veneer is available in a variety of different designs. At the Rock Garden, we offer three different styles for our natural stone veneer: random, sawn, and chop.
Our random pattern is an assortment of different shapes, sizes, and cuts, assembled in such a way that evokes the natural beauty of our stone.
The sawn pattern delivers a clean, modern, and elegant aesthetic. We saw the top and bottom edges of each piece, which give a crisp, linear look to your project once installed.
Last but not least, the chop pattern presents an aesthetic design somewhere in between random and ashlar. The stone is squared off allowing for a more uniform pattern similar to ashlar, but it also bears distinctive shapes from chiseling and chopping to provide a much more natural appearance.
Just as important as the design layout, you’re able to choose the color of the stone so that it matches the overall aesthetic of the rest of your home or property. Regardless of the pattern, our stone comes in a wide variety of different colors including many hues of gray, tan, and brown. Aim to choose a color that complements your home and the surrounding landscape.
Perhaps one of the most important choices for your stone veneer is whether to go with natural stone or manufactured stone. With some research, you’ll find that manufactured stone is usually less expensive - but don’t be misled by that initial price tag.Natural stone is not only more durable but is far superior in its appearance. Natural stone will retain its raw beauty for the entire duration of its life. Manufactured stone, on the other hand, will begin to degrade over time, especially in Colorado’s harsh climate. Artificial stone can develop a chalk-like texture after only a year or two and will thus begin to appear somewhat tacky and cheap.
If your goal is longevity and beauty, natural stone is the best choice.
To install stone veneer you will need the following tools and materials:
Tools
Materials
Step 1: Prepare Surface
Stone veneer can be applied to any masonry surface like brick, cinder blocks, or concrete. If you’re applying veneer to wood or other non-masonry surfaces, you’ll need to apply a water barrier.
Step 2: Apply Water/ Moisture Barrier
For exterior barriers, a water/moisture barrier should be applied. Simply peel back the outer layer of the self-sealing membrane and stick it to the surface you are installing stone veneer.
Step 3: Create Metal Lath Barrier
After the water moisture barrier, install an additional layer of 18-gauge metal lath. Use your masonry nails (2 inches) and space them every 6 inches.
Step 4: Create Scratch Coat
Mix your stone veneer mortar as instructed by the manufacturer, and cover the entire surface of the metal lath barrier with this mortar using a trowel. Before this mortar layer dries, use your rake to scratch horizontal grooves into the entire surface.
Step 5: Determine the Layout of the Stones
On a nearby ground surface, lay out your stones in the pattern you would like them to be when placed upon the actual veneer surface. Use your masonry hammer or grinder to get your stones into the perfect shape and layout.
Step 6: Prepare for Stone Placement
Prepare your veneer stones by washing them completely free of any dirt, sand, and other particles. Use plenty of water and your brush to get the stones as clean as possible. While doing this, prepare another batch of veneer mortar.
Step 7: Install Veneer Stones
Apply ½ inch of mortar to the back of each stone and place it in position on the wall in question. Start from the bottom (and the corners) and work upwards. Don’t hesitate to use your trowel and brush to clean any mortar that accidentally gets onto any other surfaces of the stone. Make sure to keep the joints in between stones consistent throughout the installation process.
Step 8: Finish Joints
Once the entire wall of veneer has been installed, use your grout bag to fill the joints and clean any excess particles with plain water and a brush.
Step 9: Seal Your Finished Product
The final step is to apply a sealer, however, this is optional. Follow the manufacturer’s instructions, but a brush is most often the best tool for the job. Sealed stone will be easier to clean and maintain in the long run!
Don’t forget that the quality of your finished veneer wall will only be as good as the quality of the materials you use. For the best-looking and longest-lasting stone veneer, be sure to get the perfect natural stone for your project!
Here at the Rock Garden, we have all the natural stone you could possibly need, sourced locally and ready for any design you have dreamed up. Give us a call or visit our natural stone supply store to get started!